 |
| Porch when we bought the house |
I think one of the best features of our old farm house is
the attached 3 season porch. It is sweltering hot in the summer and like an
icebox in the winter but I love having a buffer between the outdoors and the
main house. It is great for stripping off dirty boots and storing all the odds
and ends of family life. Unfortunately, it is such a useful space it quickly
became cluttered with junk we never got around to finding a permanent home for
in the house or surrounding outbuildings.
Megan and I decided after our 3rd attempt to
clean up the area and give it purpose we would try something more drastic. The plan
was to construct built-in benches with open front storage along 2 walls. I worked up a quick plan and bill of
materials and set to work clearing out the area. While moving our famous
hoosier cabinet that I have moved more times than I can count, I stepped on a
really soft spot in the far corner of the porch.
The bench design including building right over this area of
the floor so I needed to first tear it out and shore it up. After peeling back
the glued down carpet I realized this was going to be a bigger pain than I was
hoping. It seems to me that the previous owners noticed that the floor was
rotting and crumby so they just put another layer of T&G floor boards right
over the failing ones, so now I had two layers of junk to rip out. Break out
the trusty sawzall and get cutting!

After removing the floor back to sound material, I measured
everything up, cut and installed some frame work to support the old and new
floor I was about to put in. A chuck of ¾” CDX later and I had a solid floor to
start my bench build over. Notice the use of the levels which was an exercise
in futility as my new section might be level and square but the rest of it was,
lets say… not.

Using my new clamping straightedge, I ripped down and cross
cut two sheets of ½” birch plywood to size. Some glue, brad nails and clamps
transformed my pieces into benches. For this project the plan was to trim them
in place after they were level, squared and installed. Building the raw benches
is the easy part, the hard part was just beginning.

As I stated before, this porch and most other rooms in an old
(sometimes new) house are rarely square and level so I had to build a base for
the bench casements to sit on. Most cabinets have a recessed space at the bottom
which is called a “XXXXX”. It allows you to stand right up to the cabinet and
have space for your toes to go, gives you space to level/trim and it also
brings your pots and pans, etc off the floor height so you don’t have to bend
down all the way. This space is usually 3- 3 ½” but since I knew how high I
wanted the benches to be on average, I found a good center point on the floor
and made that my level point to start measuring from. What that got me for this
project was about 1 ½” on the lowest point and 3 ½” on the highest point. I set
my bench casement in place, shimmed it to level and took readings every foot along
the bottom so I know how to cut my frame. You end up with a 8’ long wedge that
will level and support the casement.

I installed all the frame work, set my casements on top and
screwed everything solid. The plan I started with in my head was to create a hinged
trap door in the corner for my muck boots to hide out when not in use. I was
going to use concealed hinges so when the door was
closed you wouldn't even know it was there. When it came down to it, I no longer
liked the idea and instead thought it would be more useful if I built a
bookshelf into the benches to store Megan's cookbook collection. Megs was hesitant
at first but I talked her into it and in the end it is her favorite detail
about the new storage unit. I measured her cookbooks and found three common
sizes. I usually make all shelves adjustable using pins but ½” plywood is too
weak for that in my opinion so I secured them with glue and Kreg pocket hole
screws. Once dry, I set the shelf casement in place I tightly shimmed it level
and square (do you see a common theme emerging from my work?) and secured it with
cabinet screws.
 |
| Corner "hole" |
 |
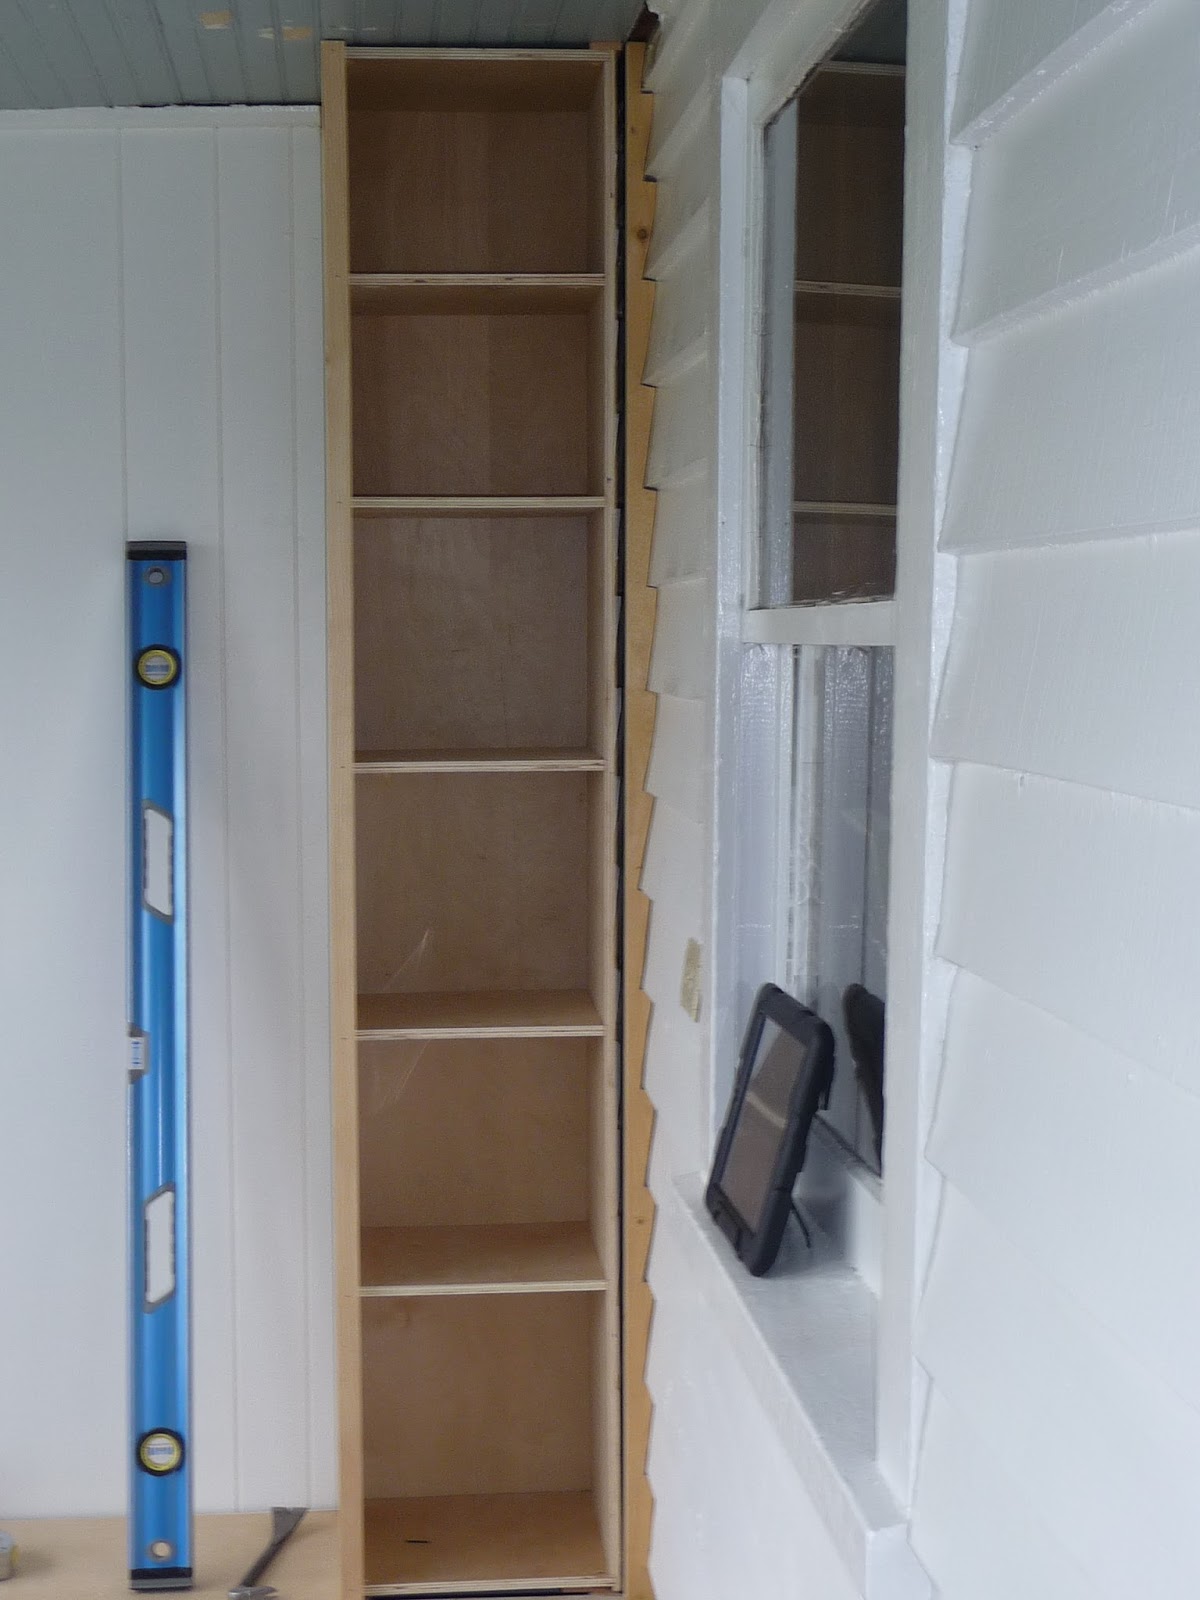
| Bookshelf |
 |
| E "sleeping" in the bench |
With all the casements roughed in, it was time to start
trimming! I ripped down some 1x pine for all the exposed faces and set to work
gluing and nailing in place. The really fun part came when I had to trim the
newly installed units to the existing clapboard siding. Megs came out to me
carefully scribing a board to match every nuance of the 60 year old wall and
proclaimed… just put a strait board there it will be fine. WHAT? To quote one
of my favorite movies, The Rock… “No scissors, you must be joking me no
scissors, do you think they told Picasso no brush?” When she says these types
of things to me it makes my heart hurt; like she was almost going to convince
me. Ha!
After a few back and forths to the shop I had a pretty good match for my liking. Some caulking and hole patching then off to Megan for priming and paint. Viola, storage unit/ bench to sit and enjoy the view.

That is looking SO good! Great job! :)
ReplyDeleteThanks a lot! We are working hard ;)
Delete