Friday, September 26, 2014

Cast Iron Clean-up

I am only 5 months late with this post, but as I say to Megs… I am so busy doing these projects, I don't have time to write about them. Nothing? Yea she doesn't buy it either.

After we finally arrived back at home with our “new” tub I had to figure out where to store it until I could get to the refinishing.  The tub was a $200 Craigslist find which we traveled to Minneapolis to pick-up from the seller's half frozen backyard.
Picking up the tub from Minneapolis, story link here

 We ended up looking like Iowa hillbillies for a few weeks with an old claw foot tub sitting proudly in the middle of our yard. Megs finally got me, with the help of her visiting father, to move the tub over a few yards against the house. It now looked like it might have been intentional and less haphazard.

I have refinished lots of metal based items in the past, however nothing this big. My preferred method is to use a media blaster to strip down all the years of paint and rust to bare metal. Others online have also used a wire brush attached to a angle grinder, but I didn't feel I would be satisfied with this level of cleanliness so I started the search for a blasting operation that could accommodate a 10,000 lb tub, at least it feels that way.

A buddy at work had just such a setup that he uses to blast large vintage tractor parts, and happily granted me access for a couple beers. Done! When using an outdoor blaster vs an enclosed cabinet blaster there are a few things to remember. 1. You need to be covered in clothes head to toe because sand at high velocities is very… abrasive. 2. There is no such thing as a nice day to do it, you are going to be hot, deaf, sweat blind, and uncomfortable in the torture created blasting hood/ helmet. 3. The 60 lb bag of sand you just took 3 minutes to meticulously pour into the pressure vessel hopper runs out in 2.5 seconds.

If all of that sounds fun to you, I suggest you make large scale blasting your profession. I would have paid $1,000 to rent a enclosed blaster that it operated by human controlled robot arms… and yes they have those, I didn't just make it up. A couple hours later I was really happy with the outcome despite the pain and suffering. 


The tub was stripped down to bare cast and ready for a primer coat.

By the way, like most buddies I have, they never realize when they say yes to my requests what they are getting themselves into. I have to say thank you again Mike for helping me lift that tub from the car to the work area and then back. It was just one of many moves this tub was going to make before settling in to it final resting place. 

That night I was able to back the van up to my shop, and create an Egyptian style pyramid builders ramp that would allow me to transfer the lump of cast iron “safely” by myself. The word was out on the street that we had purchased a cast iron tub and no one was taking my calls at this point. 

One brush coat of oil based primer (The Sherwin Williams clerk recommended All Surface Enamel Oil Base Primer in white) to keep the flash rust down and then off to bed. 


Megs hemmed and hawed over the final color for weeks after 4, yes 4, one more time 4 coats of hand brushed death smell oil based paint (Sherwin Williams All Surface Enamel Oil Base in Gloss color matched to Kind Antebellum Gray). The paint process came out awesome, the color… not so much. It doesn't offend me, but it isn't great. Or a better way to say it, it isn't bad enough to get me to repaint it.

Being late May the weather was getting hot and sticky and that oil based paint was not in any hurry to dry so after 4 days of checking I finally lined up the help and set to moving the beast into location. I wasn't keen on just trying to man handle this thing up the stairs so I came up with my own version of a furniture mover. I built a frame out of 2x4s, lined them with our old living room carpet to protect the tub and attached the whole thing to my current box dolly using EMT conduit straps. I then ratchet strapped the tub to the dolly so as not to have the two separate mid move and headed towards the house with my main muscle AA. 


There was some grunting, some teasing, and a lot of sweating and then we were done. AA and I were able to get the beast located with very little damage to anything. I did end up touching up a small section of the tub that the carpet rubbed raw but all in all the prep work and planning made all the difference.

That weekend I was able to plumb in the drain and the water supple with little difficulty. This was the first time I used hard chrome plated ridged brass tube water supply lines instead of flexible and I am glad I did. They were very easy to cut, bend and install and really make the tub look nice. 


I am very happy we went through all the hassle of using an old cast iron tub. It adds the perfect amount of charm to new bathroom. I will say it has taken me a good 5 months to feel comfortable with the kids taking bath in the tub. Knowing there would be a lot of weight on the old floor we did reinforce each floor joist when we first tore out the floor but between the tub itself… ~350 - 400lbs plus 8lbs per gallon of water plus currently 70lbs of kids makes me for the first time question my building and engineering skills. I keep thinking of the movie The Money Trap where the tub come crashing through the ceiling. But alas my awesomeness prevails again and the bath I took a few weeks ago was relaxing and not a near death experience. 


Tuesday, September 23, 2014

525,600 Minutes of Trim Painting


Five hundred twenty five thousand six hundred minutes
Five hundred twenty five thousand moments are gone
Five hundred twenty five thousand six hundred minutes
How do you measure, measure a year?

In cleaning, in taping
In painting, in Netflix movies
In touch-ups, in mess, in iced tea, in snacks
In five hundred twenty five thousand six hundred minutes
How do you measure, a year in the life?

How about trim?
How about trim?
How about trim?

Measure in trim
Seasons of trim
Seasons of trim 

A year has gone by since I posted my first post about beginning to tackle all of the wood trim in the house, hence my alternate lyrics to a song in one of my favorite musicals, Rent.  In reality, it has actually taken me more like two years because in the first month of moving into our house, two years ago I was on my knees painting the beige trim in F's room white (one of the more annoying realizations which we didn't notice until we started painting the walls). When we moved in, the upstairs generally had white trim (or beige as was the case with F's room) and the downstairs had wood trim work.  
Living Room on Move-in Day 
F's Room on Move in Day
I am not absolutely opposed to wood trim- I think it looks amazing in Craftsman houses and old Victorians but I have an OCD thing that gets especially twitchy when trim color changes throughout the house.  Not only did we already have white trim upstairs and wood downstairs but in the den, bedroom and bathroom downstairs the wood trim was a different color and style than the rest of the downstairs.  ::see eyelids twitching uncontrollably::  After we initially painted all the walls in the house, the wood trim seemed to fit better and look more updated but I just couldn't deal with the different trim on the first floor so I bit the bullet and fell down the rabbit hole of painting.

As I am finally nearing the end of endless walls of trim work and windows, I thought I would delight you with some numbers.  


13 Rooms


The whole downstairs had wood trim so everything needed 4 coats of primer and paint.  The attached porch did have white trim but it was badly worn so this also took 4 coats all around.  Both bedrooms upstairs as well as the hallway had white trim but again, it was badly worn so this all had to be redone.  Andy put in new trim when he opened the office nook and stairwell and renovated the bathroom so all this bare wood needed 4 coats as well.


21 Windows


Each window took about 1 hour per coat (so 4 hours total per window).  I trimmed only on the outside of the windows since it is very each to use a blade to later clean up any paint that got on the glass. I think the trickiest part of windows is making sure you don't paint them shut so you have have open/close them frequently as you go along which is not pleasant during the winter. (Yes, I have been known to paint wearing my fall gloves).

9 Interior Doors


6 of these were flat panel so I was able to use a roller (YAY) but the other 3 were paneled so I used a large brush.


3 Exterior Doors

Dining Room Door
Kitchen Door

Den Door


The exterior doors were all primed with 2 coats of Zinsser 1,2,3 and then painted with Glidden Natural Linen.  We had tons of paint samples, mostly ranging from yellows to beiges.  We taped the chips on all the doors looking at how the color looked with the exterior paint color as well as the interior color of each room and how the paint color changed in different lights during the day.  Nothing like a good coat of paint to update 70s doors.  I LOVE this color.


14 Doorways


I hate doing doorways... it always seems endless.


Miles and Miles of Baseboard Trim

9 Hinges Spray Painted Black

Who knew hinges were so expensive?  Instead of replacing to match the new knobs, Andy used a black spray paint on all the brass ones.

6 Replaced Doorknobs

We replaced all the 1970s brass doorknobs with Gatehouse Baron Aged Bronze Mushroom Knobs from Lowes.  This was generally and easy change over but on a few of the doors, Andy had to resize the holes for the latching mechanism.  I generally would have gotten silver knobs but I saw the aged bronze (which look black) on another blog and loved them.  I think they look so great on the white and tan doors.

2 Rolls of Painters Tape


I typically don't use painters tape when painting rooms.  I think it takes too much time to apply painters tape correctly and you still often have to touch up.  For me, it is faster to use a good angled brush for cutting in, working slowly than taking the time to tape.  I did tape for the trim work, though because I had to do so many coats it was worth the time to tape.  Also, the baseboard trim on the first floor has a weird lip at the top that was impossible to paint without getting paint on the walls.  Mostly the tape did a good job but I had to do some touch up in the playroom where we painted over paneling because the tape pulled the wall paint off a bit in places.

4 Coats of Paint (2 gallons of each primer and paint and 1 gallon of exterior door paint)


2 coats of Zinsser 1, 2, 3 and 2 coats of True White in semi-gloss for the trim and interior doors and 2 coats of Glidden Natural Linen in semi-gloss for the exterior doors.


88 Episodes of "Queer Eye for the Straight Guy"


Nothing passes the time like junk TV.

Did you know that you should apply hair product like pomades and clays from the back of your hair to the front?  Especially helpful for women pixie cuts!  Also, if your wool sweater shrinks a bit, soak it in cold water and conditioner, rinse and gently stretch back into shape! 

$100

Calculating paint costs and tape, doing the trim in the entire house was about $100.  Thank goodness my labor costs are Zero.99. 


200 Hours of My Life... Gone

Prepping the exterior door in the dining room by sanding it.  It was crackle finished and old so I wore a respirator just in case.  This is my typical painting outfit.

When did I get it all done?  Well, I generally tackled one room at a time doing all the taping, priming and painting of everything in the one room.  Each coat of every window took about 1 hour so I would often do one coat of a window during nap time time and throw my paintbrush in a bag in the fridge so I wouldn't have to clean it every time.  Everything else was in easy kid hand range so I typically did the baseboard trim and doors at night once the kids were asleep to keep wet paint handprints to a minimum (though they did happen).  Sometimes I could get a room done in a week if we had an impending date where company was coming and other times, weeks would go by in between coats (this happened a lot during the summer when we would get a sudden hot week and it would be unbearable to be painting).  On a few weekends, Andy would take responsibility for the kids outside so I would be able to get a good chunk of 5-7 hours painting a section during the day.


100% Worth It.


Totally and completely.


Thursday, September 18, 2014

A $20 Stair Makeover

Since we moved into our house just over 2 years ago, the stairs leading from the kitchen to the second story have looked like this:

They were carpeted (with a really ugly carpet) and to make matters worse, the carpet went up the sides of the walls, like a carpet fungus.  While tearing out carpet is usually one of the first projects we tackle, we waited on this one because we had no idea what the stairs would look like under it and had the issue of the carpet climbing up the walls to deal with.  

In typical Megan and Andy fashion, though, we finished up the project we were currently working on earlier than we expected on our weekend.  With nothing else better to do, Andy decided that it was THE day to deal with the stairs.  We investigated the stairs from the underside (looking up from the basement stairs) and determined that the stairs were likely made from pine and looked in pretty good shape.  Andy felt pretty confident, so face clad in dust mask and tools in hand, he made quick work of tearing the carpet off the stairs.  

There was a little padding on the stairs that also had to come up.  

Left were thousands of staples and carpet tack- the torture tool hated most by home owners.  

Andy used his favorite tools- a crowbar, pliers and hammer to take up the carpet tack and staples. 


 Once the stairs were unveiled we were thrilled to see they were in good shape.  They are banged up as one would expect in an old house but definitely salvageable.  

Thankfully there was drywall under the carpeted sections that went up the walls so this turned out to be as simple as pulling the trim off, pulling the carpet and removing staples.  
Death by staple removal
Another worry we had prior to tearing out the carpet was whether the stairs would be more or less treacherous without carpet.  The stairs are clearly left from days when the upstairs was merely an attic so they are narrow and slightly steep.  We couldn't live with the current carpet though, so we decided to take it off planning on painting the stairs but prepared with some back up runner ideas to attach if the stairs felt too slippery.  The first day or two of bare stairs was a bit nervousing (totally made up word) but once we got used to not feeling carpet, we both felt confident on the bare stairs so we continue with Plan A- painting the stairs.  

We have been amused how many projects we have done in this home that have mirrored projects we completed in our first home and this definitely follows the pattern.  Our home in DeKalb, Illinois had a converted attic staircase with a carpet runner which we tore out and replaced with a hand painted runner.
DeKalb stairs- Risers and rail are brown, outside of tread is light blue and middle of tread is navy blue

Before I could get to painting, Andy had to replace the grate on the riser of the second stair.  The grate was screwed to the face of the riser and would easily get caught by shoes and bend out of shape.  Andy took apart the adjoining tread and rebuilt the runner, installing a grate on the backside so it wouldn't get caught as people went up and down the stairs.  

We picked out this decorative grate from Amazon


The riser is removable in case we need to get to the duct work underneath.  

I wanted to do something different in this house so I hit the internet and Pinterest.  I am really good at executing other people's ideas but rarely can think of something completely on my own.  After lots of searching, I found the perfect, simple design from paintedtherapy.blogspot.com.  If you check out the link, you will notice that I pretty much copied the design, down to the colors exactly.  Often times there is no reason to reinvent the wheel.  

Andy filled in major holes and sanded down the stairs to prep them for paint.  

After a really good dusting and cleaning, I coated the entire staircase and wall where there was carpet with Zinsser 1, 2, 3 white primer.  

The hardest and most time consuming part with painting a staircase is timing it and planning around foot traffic.  I started at the top and worked my way down one night after we were sure the kids were asleep.  Thankfully, the primer dried super fast. 
Next, came the white border.  Since the middle of the stairs would be blue, I just painted the wall sections and outside sections of staircase in true white paint/primer in semi-gloss.  Again, I worked top down and did one coat during nap time since we would still carefully walk up the middle and a second coat that night.  

On to the mathematical portion of the project.  To make things simple, I went to the store and choose a painting tape in the same width that I wanted my skinny stripes.  I taped out a few options- mostly looking at how wide I wanted the middle section in blue.  I ultimately decided I wanted that to be pretty wide to look like a traditional rug runner.  The stair width is 30" so I decided to have 18" of blue down the middle followed with 1" of white on both sides, followed by 1" of blue on both sides and finished with 4" of white.
Not at all to scale but the general idea
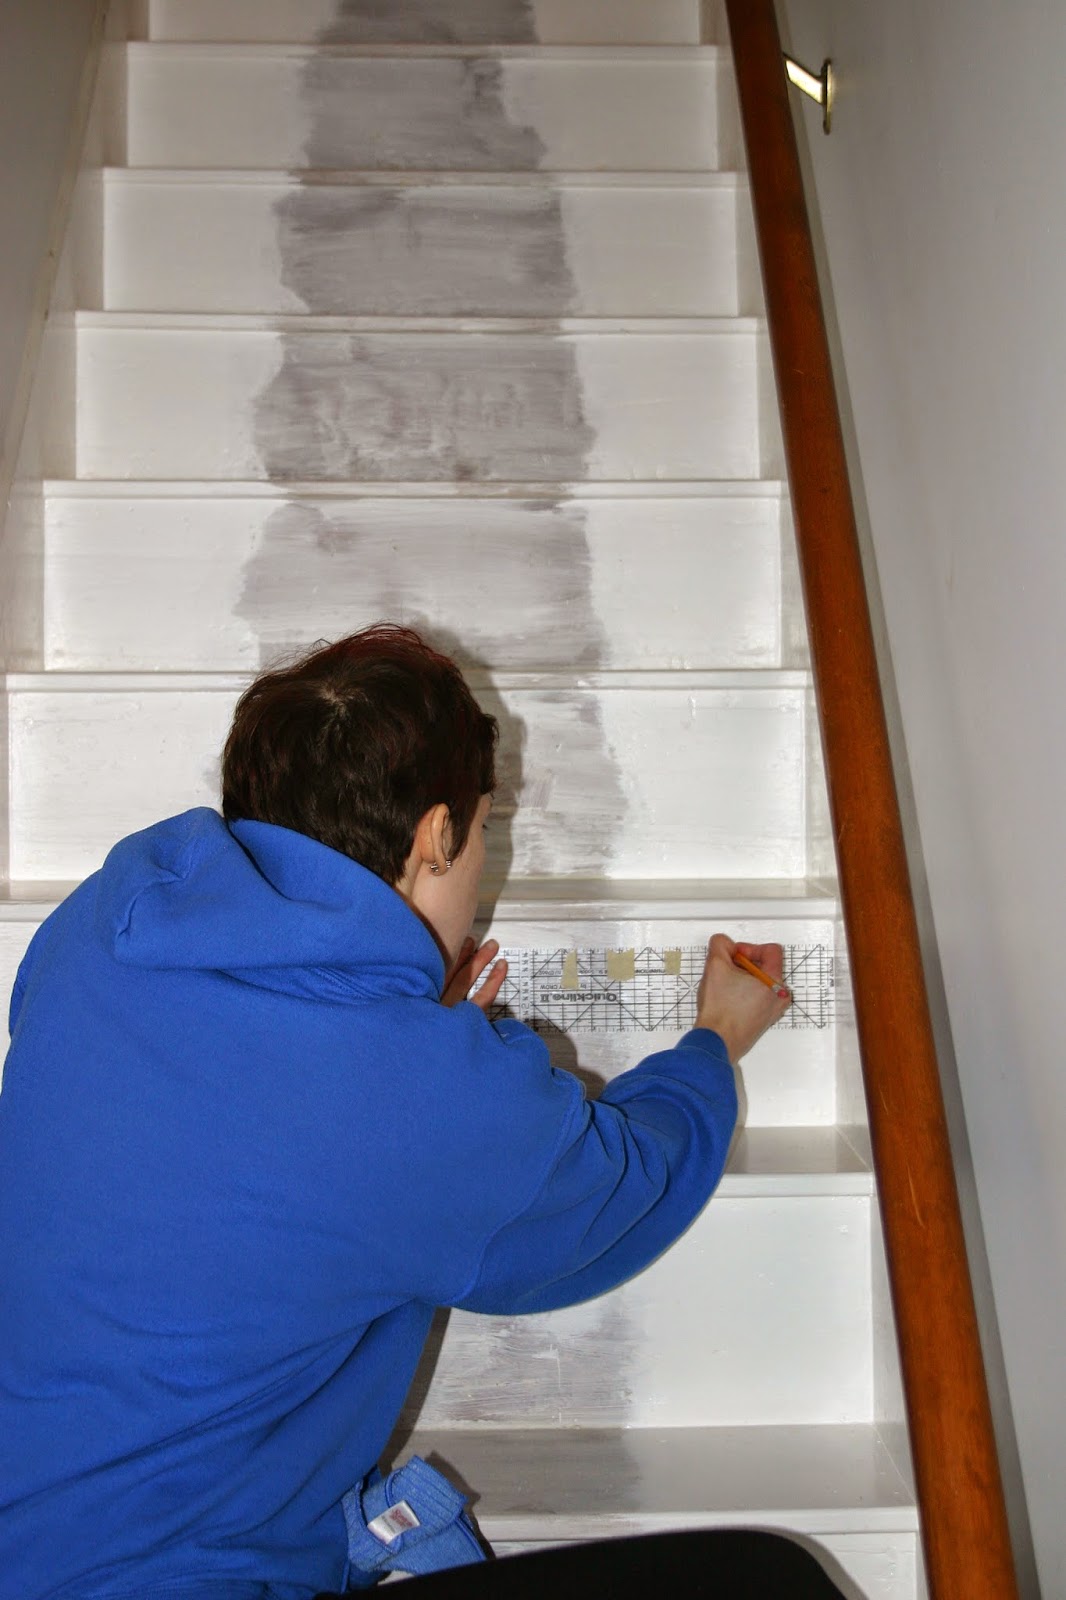
Using a ruler and pencil, I marked a line at each break of color at the top and bottom of every tread/riser.  

I then used 1" blue painters tape to mark the areas I would be painting blue.  

This was where buying the correct width of tape came in handy because I was able to use one width of tape between the skinny blue stripe and the large blue runner.  Right now, I will say that I used the wrong tape.  Though I bought the nice and expensive blue painters tape, it wasn't very sturdy and kept ripping.  It was much easier to keep a straight line if I rolled out the tape in a continuous strip all the way down the stairs.  Also, a little preview as to what's to come, the blue tape did not do a very good job of keeping the paint from bleeding under the tape.  After further research, I think frog tape might have done a better job in the end.

Once I had my lines taped out, I used Behr's Blue-Grey Slate paint/primer in eggshell (the same as on our bedroom walls).  Had I bought paint specifically for this project, I probably would have made the mistake of buying semi-gloss, which is a better finish for high traffic areas like floors.  This would have turned out to be a mistake, though because the gloss would have shown the imperfections of the stairs a lot more than a more matte paint.  I did two coats of blue paint, going from the top to the bottom of the stairs.  

After the stairs were dry, I slowly removed the tape for the big reveal and, damn.  Some bleeding on the tape lines.  

To fix this, I broke out one of Esther's paintbrushes and did touch up with the white paint.  Again, I think using frog tape would have helped with this issue.

To prevent the stairs from chipping due to frequent foot traffic, Andy used a wipe-on clear polyurethane.  This turned out to be a huge disaster.  First off, it wouldn't dry despite the can's stated dry time so the morning after application, the kids came down leaving sock prints all the way down the stairs.  Secondly, after a week or so the polyurethane began to yellow at the corners.  This has never happened to us and I still have no idea why this happened.  

After several months of thinking, "oh, we need to fix this...", Andy finally got around to sanding the stairs and applying a traditional brushed-on polyurethane in satin (again, we didn't want anything too glossy since that would show the imperfections of the wood even more).  It actually turned out pretty good that we waited so long because dragging construction materials up and down the stairs for our bathroom remodel created several chips in the paint that we were able to touch up once the polyurethane was sanded off.  

Andy reinstalled the trim work and I primed and painted it all white.  Finally, the rail was primed and then painted the same color as the stairs.

Since I used paint that was around the house, the only things we needed to buy for this project were the painters tape, polyurethane and the new grate so the total for this project was under $20!  Best 20 bucks I've spent in a while!  Just refer back to the picture of the original stairs covered in a carpet fungus if you don't believe me.