After two full weekends of hard work and clear skies, Gidget has a new floor. We will not pretend that any part of our work on our 1954 canned ham trailer will be a "restoration" project. This is full on replication. As we dig more and more into our little gem, we are shocked that it lasted as long as it did, held together mostly with spray foam and rusty, crooked nails. By the end of all of this, we expect the only original pieces left will include the metal skin, windows and stove.
A few months ago, we spent a weekend doing some
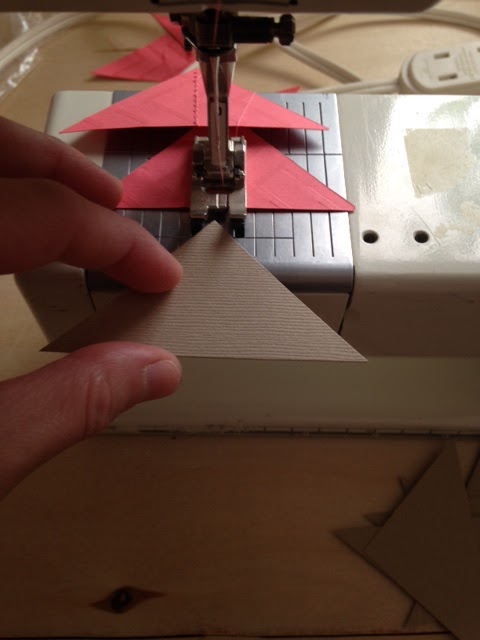
basic interior demo to prepare the trailer for it's eventual and inevitable exterior repair. In the months of rain, we measured all the cabinetry that came out to replace later, took apart and cleaned up every component of the Martha Washington stove and replicated the
two front benches that fold into a bed.
 |
| A sneak peak of the new bench fabric |
Finally into gorgeous spring weather, we took advantage of a couple of free weekends with the promise of no rain and tackled the front wall. The biggest oddity in the way these trailers were constructed is you have to take them apart from the outside in just to replace any of the interior paneling. All of our interior paneling was rippled from decades of water and growing mold on top of mold so we knew going in that every wall would have to be replaced.
Manned with our favorite demo tools- a cat's paw, hammer, crowbar, drill and screwdriver- as well as the knowledge from many nights watching YouTube videos from the expert trailer guru at
http://www.cannedhamtrailers.com we started in carefully removing the corner rails then metal exterior skin. Each wall of the trailer is supported by the adjoining wall so to maintain the structure, we only remove one section at a time.
 |
| Andy not excited about all the flathead screws |
Under the skin, 1950s insulation, framing and paneling was revealed.
Once we carefully removed the window (which we will reinstall), we were able to remove the framing and paneling, leaving a large section we could then use to measure when we replicated and replaced with new wood.
Removing the front panel revealed the floor which kind of led into a long rabbit hole of thinking we could just replace small sections but then realizing it was better to just go ahead and replace the entire flooring. (We made this decision after I had already spent hours trying to peel crazy old linoleum off of plywood, grr).
 |
| Removing the linoleum with a Ridgid JobMax... this turned out unnecessary when we decided to replace the floor |
This was a slow process- not difficult but just time consuming to remove things slowly to maintain the original structure.
 |
| Using a circular saw to cut flooring into smaller sections to remove |
The floor has 5 layers: starting at the under carriage with the metal trailer frame, followed by soundboard, then wood framing, insulation and finished with plywood. All of this needs to be carefully measured, cut and tucked inside through the small front opening then fastened with carriage bolts.
 |
| Original flooring section- the original didn't have insulation but we decided to add it |
 |
| Every carriage bot needs to be removed from underneath- many needed to be cut off |
 |
| New soundboard and framing |
 |
| New insulation |
We only replaced the front half of the floor on the first weekend because we were afraid that if we took all the flooring out the structure would be too flimsy. Once the front floor was replaced, we replicated the front paneling using 1/8" thick luan and 2x2 framing cut down into 1 1/4" to match the original framing. All this was screwed back into the side walls... that will eventually need to be unscrewed when we replace the rotted sidewalls. Super annoying but we don't know another way around it since you definitely can't take all the walls off at once as you would loose all the structure. As it was, to get the front panel screwed in, we had to push on one side while screwing the the other just to get it all straightened out again.

The next clear weekend, we did the exact same thing to the back half of the trailer first removing the exterior metal, framing and paneling then replacing the flooring. The back section was especially disgusting with sections of moss growing in the flooring as well as a new birds nest in the floorboards.
 |
| Terrifying hole in floor covered with random pieces of plywood |


The back bar of the metal frame was so bent out of shape that after some waffling, we decided to replace it.
 |
| Old bar on left; new on right |
Really, Andy doesn't need much of an incentive to whip out his welding mask and at $12 for the metal was a cheap fix.
New bar welded on, the rest of the floor was replaced.
 |
| Back half ready for insulation and plywood |
Gidget is happily sitting in our driveway now with a new floor. After 7 months of renting, we are all happy to have the cheerful hum of saws running again. We aren't getting too much into specifics here with these updates so please check out our favorite resource:
http://www.cannedhamtrailers.com if you are tacking a similar project. Thankfully, we have our super helpers on the job with all our projects.