
Meow.
One of the perks of renting has been having the time to do a little furniture updating. Though we are constantly busy with three kids, work and slowly restoring our vintage trailer, we have crammed in a few minor projects. Most of our major furniture was purchased when we were first married, 11 years ago. After a decade of living, many pieces needed updating for obvious reasons (you can only flip the couch cushions so many times) and other pieces have just outgrown us, size wise or style wise.
One of the ways our style has changed is wanting some custom and eclectic pieces around our house. When living in Decorah, I discovered this amazing shop in Chatfield, Minnesota, Adourn which had antique furniture updated with modern paint and fabric. A love connection was found and ever since, I have tried to get my hands on as many furniture rehab projects I can. So, when E had outgrown her dresser, I was ready to jump at the chance to give an old piece some love.
I have little patience or time for thrift store or garage sale shopping, though this is probably the best way to really get a steal. I found my gem instead in a local antique mall. As soon as I turned the corner, the high dresser spoke to me.

Two doors reveling two drawers (one even with drawer dividers perfect for unmentionables) with three lower doors, perfect for a grade-schooler's budding wardrobe.

The dresser had a few obvious places of wear that would need fixing but Andy gave the ok so I brought it home. Thankfully, it was love at first sight for E too.
When buying old furniture, give the piece a good work-over before purchase. Some things that I look for:
- Do the drawers/doors open and close easily and correctly?
- Take out all the drawers. Look for anything broken on the drawers then look in the dresser. What kind of support is inside? If you are planning to store heavy things or put something heavy on top (like a TV), all drawer openings should be separate "boxes". When I take the drawers out of this particular dresser, it is just a big, open box. I was ok with this for this use but when I bought an antique dresser for a TV stand, I made sure it had completely closed areas where the drawers were to give more support.
- Check the sides of the drawers. How are the drawers joined? Dovetail joints are usually an indication of good craftsmanship.
- Lift the piece. Is is heavy for what it looks? A light piece often indicates cheap wood (fiberboard, etc).
- Do you like the hardware? Hardware is easy to change, but can be pricey.
- Do you like the color/finish? If it is painted and you want stain, stripping paint is time consuming and can be pricey if you use liquid strippers (and can also take years off your life with the fumes!)
In most cases, many of these things are not necessarily deal-breakers if you truly love a piece but are things that you should be aware of, especially to foresee the work and cost that will be involved with rehabbing your new piece. The knowledge can also often help you negotiate a better price.
I knew I was getting into a pretty extensive rehab with this dresser and even then ran into additional things that ended up needing fixing. Thankfully, I keep Andy chained in the garage to help me with this upsets.
First order of business was to sand the dresser down. I knew I was going to paint the dresser so I just needed to get a couple of layers of old paint off and make sure everything was nice and smooth. Where I was able to, I used an orbital sander and in corners I used a sheet of sandpaper and elbow-grease.


Once sanded, I filled any holes with wood filler and tightened up all the drawers with wood glue and Andy's serious assortment of clamps. Luckily, the shell of the dresser was in pretty good shape but all of the drawers needed to be reglued at the joints.


I chose Behr's "Little Black Dresser" for the final color. It is a slightly off-black which I thankfully was able to talk E into since I thought it would look great with her pink walls and I'd been dreaming of a black dresser with brushed brass accents for a while. Turns out, black paint is kind of a bitch to do because it shows every single dust speck that inevitably lands on it during the process. Thankfully, I finally got it painted with a few coats of flat paint and love how it looks. I painted the sides of the drawers with a bright pink for a little surprise.

To add some flair, I decided to stencil on a flower design on both sides of the dresser. I wanted to make the dresser a bit girly but also make it easy to change when E inevitably turns thirteen and doesn't want flowers and fairies all over her room anymore. I considered doing wallpaper on the sides but vetoed this in the end because it would have been harder to change.
I found a stencil I loved at royaldesigns.com but didn't want to wait for the shipping and had a hard time shelling out $40 for a stencil. So, I ran to Michaels and found one I liked just as well. Using some stipple brushes and a coral, pink and off-white paint, I gave it a test run. Disaster. The size of the flowers were way too small for such a large space and the hard stipple brushes were a nightmare.
Back to the drawing board... or in my crazy case, make-your-own-stencil board. This is not my first adventure in homemade stencils. I have actually done it several times now, all in the same round about way. At this point, Andy just goes out and buy me a sheet of stencil plastic knowing I will eventually just make my own.
Making a stencil is pretty darn easy. You can buy large, blank plastic sheet for stencils at a craft store. I then find a design I like, print it out and copy it onto the plastic using a thin, permanent marker. Using an exact-o knife, precision and patience, I cut out my marker lines, creating the perfect stencil. To make my life a bit easier, I made one large flower and a few leaves and decided I would hand paint some little flowers and leaves to fill in the spaces.

New stencil in hand, I used some stencil adhesive on one side to make the sheet sticky so it would stay on my dresser. I am not an expert on applying stencils yet- I have experimented with stipple brushes, foam brushes/roller and craft paintbrushes all with mixed results. In this case, I used a small craft brush since the flower and leaves were pretty small and applied 3-4 thin coats of paint. I still had a bit of bleed-through which I went back later with some black paint to cover.

After all the flower and leaves were stenciled on, I tried my hand at some free-hand flower buds (on a scrap piece of wood, of course!). Yeah, an artist I'm not as this was a disaster. So, I tested out a few other things until I finally came to the design I liked.

All dry, I applied three coats of satin polyurethane.
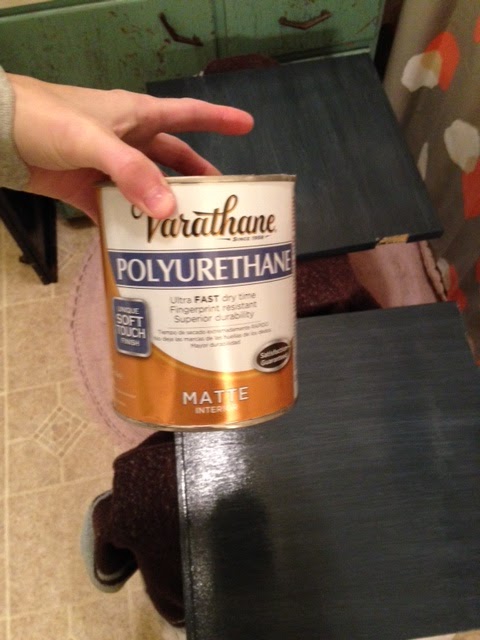
I hate this stuff. It is crazy annoying to put on, constantly trying to make sure it dries smoothly and doesn't drip (a fate I was unable to avoid). I prefer a satin finish for furniture but it does tend to show brush marks so you have to be careful to apply evenly. The type of poly that I bought doesn't require sanding in between coats but sanding is often required so read the directions first!
Finally done, I was able to screw on my fancy new hardware which I snapped up from CB2.


I was surprised at how high quality the knobs were for a really reasonable price. Some of my other go-to cabinet hardware stores are Cost Plus World Market (super cost efficient!) and Anthropologie (great for unique, eclectic pieces but can get super pricey if you need several knobs/handles). You can also check your friendly, neighborhood antique store and might get really lucky (remember, hardware can easily be spray painted to change the color/sheen!). Andy steered me toward a product- Thread Locker which you apply to the screw to keep your knobs from spinning loose.

Viola! Finished cabinet, perfect for my whimsical 6-year old!

Fabulous. You make it look so easy. Love the finished product.
ReplyDelete