Monday, September 30, 2013

Re-Purposed Reflection

Ever so slowly, Megs has been turning me on to using found items around the farm. I have always been, and will be in my heart, a lover of a fresh sheet of plywood. There is something so optimistic about a 4 x 8 foot sheet of opportunity. It softly whispers to me… I can be anything you dream of with just a few cuts of your saw. If Yankee Candle sold a fresh cut lumber candle, I would be first in line to buy, along with damp campfire, and vaporized cutting oil, but I digress. However, most of the projects we do on this old farm make my joyous, dimensionally stable wood look out of place. And when I do complete a nice modern looking piece of furniture, Megan enters and faux paints it to make it look old… thanks for teaching her that one Adourn! (We love your store though)

Despite all my complaints, Megs called it right when she asked if I could make a frame for the current vanity mirror in our bathroom out of some old wood.
Master bathroom when we moved in.  Since then, we installed a new vanity sink

When I was tearing out the bunker walls in the grainery, my new shop, I saved as much of the good looking 8” shiplap boards I could. You might remember those boards from such projects as the compost bins and soon to be exterior porch table. (Best Troy McClure voice)

I asked Megs how wide she would like the frame border and in typical fashion she walked me into the bathroom, cocked her head slightly, squinted one eye, held up her finger and thumb by the mirror and proclaimed… mmmmm, like that. Once I had converted that into useful human information, 2 ½” to be precise, I headed to the shop to rip some lumber. I found 2 “good” looking boards that still had character, nail holes, divots, etc, I got to making dust. A quick sand with some 120 grit paper cleaned up the face of the boards while creating more depths with the untouched inclusions.

What Megs usually looks for in these types of projects is 20 minutes worth of work, 4 butted joints, and for me to glue the boards in some fashion to the mirror… bam, done! I on the other hand am not capable of completing jobs in that fashion. I have tried, but I just can’t do it, it hurts my soul and I feel my talent lies in being anal with my work. I started by measuring the distance between the wall and the face of the mirror (5/16”) and cutting a 1” wide rabbit around the inner perimeter of the frame. This would allow the frame to sit tight on the wall as well as the mirror, creating an encased frame appearance.

Original mounting hardware


Mounting hardware hidden in the framework
I also cut a relief groove in the top frame side to accommodate the current mounting hardware that holds the mirror to the wall; we can’t have that showing! Then I re-sawed the bottom side of the frame to the remove 5/16” worth of stock. I had to do this because unlike the other 3 sides, the bottom sits right on the vanity sink backsplash and face mounting my new frame is the only option.

Once all the individual sides were milled I took them all inside to measure dry fit, and mark them for length. The famous Norm Abraham once said, only measure when you have to, which I try to follow whenever I can. As an engineer I would love to talk about why this principal is so important but the short of it is, if the parts follow the edict of Form, Fit, and Function who cares what the measurement is! Errors are made in measurement so skip it when you can. I lined everything up, scribed my lines and headed back out to cut the 45 degree bevels at the corners. Some fine tuning, glue, and a couple of brad and pin nails to hold it all together and the job is done.


The warm look of the natural wood completely transforms the feel of the bathroom and maintains some of the heritage of the old farm. Repurposing old lumber from the grainery into the bathroom… she’s a smart chick my wife. 
We agree next thing to go in the bathroom is that light!  We are thinking this.

Thursday, September 19, 2013

Who Wants Half a Cookie?

I know many of you are waiting with bated breath to find out how our bathroom vanity update turned out but Andy is heading up to "the big city" (Rochester, MN which is a two hour round-trip drive) tonight to pick up our new hardwood floors for the playroom and master bedroom so he won't have time to blog tonight.  Alas, the vanity will wait but the cow in our basement will not.

If you have been reading our posts, you might not notice a huge difference from our previous suburban life to our new one in the country- generally a continuous stream of home improvement projects.  Well, the state of our freezer will tell you otherwise.  It all started one day while Andy was at work.  Across the cubical forest, he hears, "Who wants half a cookie?"  Andy's head pops over his "wall" as he yells, "I DO!"  He heads over to a co-worker's desk and asks, "Where's the cookie?"  Looking confused, his co-worker replies, "Do you want half of my cow, Cookie?"  Andy replies, "Sure!  But now I also need an actual cookie.  Seriously.  Right now."

Prior to our big move, all our meat came from the grocery store.  If we were feeling really fancy, we would head to a local butcher for chicken breast or steaks (oh Imbodens, I miss you so).  When we first moved last summer, we quickly learned that most people around here get their meat from local farmers.  Last summer, we got a quarter of a cow (from the same co-worker) as well as several of her chickens (butchered and cleaned by a local Amish family). We were surprised at how obvious the difference is in the quality and taste of the meat.  So, this year we decided to go for half the cow and so entered "Cookie" the cow.

I love to cook, but the typical (I think) suburbanite I am, I really have no idea what cuts come from what part of the cow and how many cuts there are in a cow.  Enter a quick Google search to get a general idea of how much and what type of meat we could expect from half a cow.  Surprisingly, in this case, the internet was not super helpful but luckily the butcher in charge of "Cookie" was clearly used to dealing with newbies.  He asked basic questions and I answered (to the best of my little knowledge):

"How many steaks in a package?"--"2"
"Do you want the brisket?"--"Yes"
"How many pounds of ground beef in a package?"--"1 lb"
"How many pounds a roast?"--"3ish?" (He confirmed this was a typical poundage for roasts)
"Do you want ribs?"--"Yes"
"Do you want soup bones?"--"Sure?"
"Do you want the offal?"--"NO"

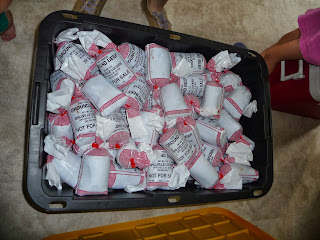
And so on.  I checked the percentage of the ground beef- at least 90% and when the cow would be finished-in a few days and that was it.  Pretty painless!  Three days later, the call came in and we headed to the processor to pick up our cow.  The meat comes frozen; steaks and roasts packaged in brown, butcher paper and ground beef in tubs, all labeled with the date and cut.  Half of a cow filled up 4 coolers!
2 Cooler Full of Just Ground Beef!


For anyone interested in what cuts half of a cow consists of, this is what we got: (I counted steak packages; each package has 2 steaks in it)
8 Beef Roasts
3 Rump Roasts
1 Brisket
126 lbs Ground Beef
7 Minute Steaks
8 Rib Eye Steaks
7 Round Steaks
5 Sirloin Steaks
5 T-Bone Steaks
9 lbs Soup Bones
2 packages Ribs (2 lbs each)

We pay the owners of the cow for the hanging weight which was 422 lbs- we got a total of 242 lbs of meat from the cow once it was processed.  We also pay a processing fee to the butcher which we think is really reasonable- $223.  So, in the end, the beef came out to $4.14 a pound.  Last year, I calculated what we got verses grocery prices and it came out pretty even.  Obviously steaks are usually much more that $4 a pound but ground beef is often cheaper so it evens out in the end.  Regardless, this is SO much better quality than any store-bought beef I have ever had.  Several of our family members have claimed meat so in the end, we will keep 60 lbs total.  Unfortunately, though, we will not be able to drop-off meat for a few more weeks so our freezer is currently PACKED between the cow and 7 chickens that are waiting for homes.
Stuff stacked on top of the cooler to make sure it is completely closed

What half a cow plus 7 chickens looks like! (Actually minus 50 lbs of beef my sister already took)

We have already used 4 lbs of delicious ground beef from "Cookie" for chili and burgers but the moral of the story is: Always question before immediately answering, "Yes! I want half a cookie!" so you aren't left with a cow and still hungry for a cookie.


Tuesday, September 17, 2013

Who glued these quarters down?

In all the houses Megs and I have stayed in or bought beige has been the color pallet of choice. That was the same with our new house. However this color scheme expanded in the master bath with an old dingy looking beige vanity top mounted on an fake oak 2-drawer vanity. As with most projects in our lives, if it functions well enough we leave it alone until it drives us nuts.

As per Megs usual MO, she shows up with a crusty old bathroom sink wedged in the back of the car. Piled on top are various bits of family life, a stroller, box of diapers I can barely lift, and food scraps strewn about like a pack of raccoons got into the car. After busting a nut and getting this thing out I set up the saw horses, busted out the Barkeepers Friend and start scrubbing. After 10 minutes this thing is looking pretty good!

With E’s help we pulled out all the stuff from the old vanity so we, yes we (meaning E and me), would have room to work. 

Let’s begin; Place a towel down for leaks, shut off the water, unbolt the water lines, unscrew the trap and pull out all the drain plumbing. A good pro’s trick to avoid the sewer smell when plumbing is to shove an old rag or paper town down into the waste stack. It will stop the gasses from escaping but it will also stop the water from traveling down so leave a bit sticking out to remind you to remove it before re-installing the new plumbing!
Out with the old is the old saying, unfortunately the disco sink was glued down with construction adhesive and didn’t want to budge. (Anger!) I grabbed my trusty Ridgid Jobmax with an old gummed up blade and made short work of cutting through the junk. 

Once the old sink was free and clear out in the yard, we look like hillbillies sometimes, I used a chisel to clean up some of the remaining dried globs of adhesive from the vanity. The vanity was as level as it was going to get so I dry fit the sink on top. With that good to go I could start to put the whole thing back together.

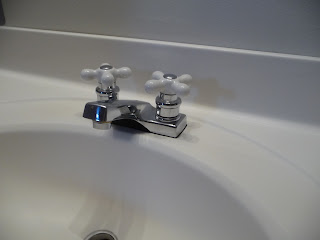
Hoping the next guy would curse me like I did him I caulked on a liberal amount of heavy duty construction adhesive and set the sink in place. Next, I inserted, centered and tightened the "new" faucet (another ReStore find) onto the sink and set about plumbing the fresh water lines. 

Once all connections were water tight I installed the old drain in the new sink. Using the adult version of silly putty, plumber’s putty, I rolled a thin snake with my hands and applied the putty to the underside edge of the drain. This is the location that comes in contact with the sink and ensures a water tight seal between the two components.

The last step in the process was to reconnect the P trap and waste stack. Now is the moment of truth… turn on the water valves, crack the faucet and let the good times roll. A little dripping from the connections at first is pretty normal, at least in my opinion. I always go back through and check to make sure all connections are tight and there are no spiting water leaks. Viola: new vanity.


As you can see by the picture above there used to be a mirror on the wall that had to come out when the sink was replaced. Stay tuned for more of my (Megan's) design genius on bringing that into the modern era.

Ap

Sunday, September 15, 2013

The Arrival of the Little Trim Painting Elf

Now that we have our new wood floors ordered for the den and master bedroom, I decided it was finally time to start tackling the trim.  The entire first level of the house has wood trim on all windows and baseboards as well as natural wood doors.  When we first moved into the house, the wood trim looked really dated.

Surprisingly, when we painted the rooms, the trim looked a lot fresher as we found we could live with it for a while.

 Unfortunately, our tolerance has come to an end.  I think I could have lived with the wood trim if it had all been the same but with additions put on the house throughout the years, the trim from room to room was different.  The kitchen windows and exterior door were painted with a faux-finish to look like wood (and therefore chipping); the den and master bedroom has faux wood trim and doors that is a plastic material and lighter than the rest of the house; upstairs has all white trim.  Since we are putting in new floors in the den and master bedroom, I finally decided to tackle this huge project.  A few numbers:

10 Doors

12 Windows

7 Rooms of Baseboards (plus 1 stairway)
So, a daunting task (which is really why it has been put off).  But, happy little painting elf that I am, I dove into the den and master bedroom with the plan to finish the two rooms before the new flooring arrived.  Optimistic little painter that I am, I planned on one coat of 1, 2, 3 Zinsser Primer and one coat of True White EasyCare Interior from True Value paint in semi-gloss finish.  A week later, and FOUR coats later (2 of primer and 2 of paint) and this disgruntled little painting elf is slightly regretting the decision to paint the trim.  I have learned several things though (other than how to properly apply hair product thanks to a "Queer Eye For the Straight Guy" marathon I'm watching):

  1. I NEVER use painters tape, just brush slowly but this is the kind of project that is much easier with tape.  Take the time to tape around the trim slowly and it will save a lot of time down the road.  Even though there is tape though, don't slop it on the tape too much or it will peel when you remove the tape.
  2. Wash the trim and windows really well before before starting or you will be brushing around dust.
  3. An angled brush with a short handle is great for getting in tight places and doesn't cramp up your hands!  
  4. Next time I wouldn't use the EasyCare paint.  It was very thin and I think was the primary reason I had to use 4 coats.  I probably would have gotten away with 2 coats of primer and 1 of paint if I had a thicker semi-gloss paint.  Even though clean-up is a HUGE pain and it is generally more expensive, I would use oil-based paint next time (though I am hoping I don't have to paint trim again after this project for a LONG time).  It will save time in the long run and by applying fewer coats, the price will probably come out pretty even in the end.

So, some good lessons but very slow going, nonetheless.  After a week of painting, I have 3 windows totally finished and 5 doorways with only 1 more coat to do.   The difference is amazing and I think will really update the house tremendously... if I ever get finished that is.
Sparkling new white trim in den


Tuesday, September 10, 2013

The Siren Call of Hardwood

Time to deal with the huge, orange elephant in the middle of the room.  Yes, I am talking about the carpet in the playroom and master bedroom.

Leftover from an era of John Travolta doin' the disco and mass bra burning in the quad, this carpet is the epitome of 70's style.  Even worse than the color that looks shockingly close to F's diaper this afternoon, there is only about an 1/8" of foam separating the carpet from the plywood floor.
So, after living with the color, smell and discomfort when sitting on the floor to play with the kids for the last year, we decided it was time to tackle this project!  We decided to look at carpet since the kids mostly play on the playroom floor and I am getting too old to sit on a hard floor to play with them!  Andy and I are strictly hardwood floor people, but we decided this area would be a good one to break our rule.  I went to a local carpet store and got some basic information on carpet options.  I brought home five samples to show Andy.

Options 1 and 2:
I just have one picture but the carpets basically look the same; one was $3 a yard cheaper and I wanted to see if Andy could tell the difference without knowing the price (he could).  Just a basic, low shag.  Pros:  Wouldn't show the seam going through the room too much, cheap, won't run (like a Berber), good stain resistance.  Cons: Basic, low shag carpet.

Option 3:
  A small loop carpet.  This is what I probably went to the store looking for.  Pros:  Modern looking, soft, good stain resistance.  Cons:  Would show seam more, huge possibility to snag a loop and run the carpet.

Options 4 and 5:
On the left: a basic Berber.  The cheapest of the five options.  Pros:  Cheap ($18 a square yard), inoffensive looking.  Cons:  Would show seam, possibility of snagging and running, cheaper feeling backing, not as great stain resistance.  On the right:  A low shag with a kind of random pattern.  This was my favorite leaving the store (and of course the most expensive at $28 a square yard).  Pros:  Really soft, well made, modern looking, wouldn't show seam, good stain resistance.  Cons:  Expensive, bad color choices, Andy called this Grandma carpet right away.

Once we brought all the samples home and Andy and the kids did their comfort tests:


We had narrowed it down to options 4 and 5.  I (at this point, Andy really didn't care) leaned more toward the most expensive one since it felt really soft and had a really good stain resistance warranty.  I wasn't thrilled with the color choices but put the board up in the playroom anyway for the weekend.  By Sunday I hated it (and the rest of the samples).  We decided to check out two more carpet places to see if we could find something we could live with.  At the second carpet shop, I fell in love with a REALLY soft nylon Berber that was on sale but still even more expensive than the top carpet I had found at the first place.  The total for the two rooms would have come out to about $2800 before tax (the other sample would have been more like $2000 after tax).  On top of it, the roll they had left was already sold and they weren't sure if they could get more in.  The store was wonderful though, equipped with a playroom for kids, popcorn machine and hot dogs so if the roll hadn't have been sold, I probably would have talked Andy into it and bought it on the spot.

We left and headed to Home Depot just to check their options.  I figured if we didn't find something we liked there, we would head back to the original local carpet store and see if there was something I missed in my first visit.  While I was looking at every carpet option in the racks of Home Depot, distracted Andy wanders over to a pile of rugs on sale.  "Hey!"  He yells across the flooring department.  "What if we just bought 10 of these bad boys and laid them end to end."  Laughing, I humored him and headed to the stack of rugs to see what had caught his attention.  A plush, beige shag 5 x 7 rug.
You can see where this story is heading since this was clearly taken in our playroom.

I thought after 8 years of marriage I had gotten him out of his beige and more beige style.  Not impressed, I nonchalantly leaned my hand against the rug and fell into a daydream of kittens rolling in a pile of cotton balls.  Seriously the softest rug I have ever touched.  Though I was in heaven, and happily surprised by the $120 price tag, I didn't seriously consider just laying a bunch around the two rooms.  Not seeing any carpet options, on a whim I said, "Let's check out hardwood".  And that was the end of carpet.  Right we we stepped down the hardwood aisle, all thoughts of carpet left our brains.  Right away, we found 3 1/4" wide hardwood for $3.40 a square foot.  Since Andy can do the install, that puts us at $1500 for the two rooms! WAY under our pricing for any carpets that we actually liked at all.  One of my initial concerns about hardwood in these rooms was the comfort level of sitting in the playroom with the kids- this is solved by purchasing that amazingly, soft, plush rug.  My second concern was having a hardwood in the living room which shares a doorway to the playroom.  I knew we would never be able to find a match for the living room hardwood and didn't want hardwood in the playroom/master bedroom to look like we tried to match but failed.  I thought that a wide plank (the plank in our living room is really narrow) and a light, natural wood tone would look totally different but still go with the character of the house.  After consulting a really helpful Home Depot employee, we found a perfect Hickory hardwood in the special order section.  I didn't get a picture of the board at the store, so check out this link.  Our total price after check-out for all the hardwood flooring, heavenly rug and a breaker box to replace the fuse box upstairs was just under $2000!  Andy and I are both thrilled with our hardwood choice and happy we ended up spending less on hardwood than we would have for carpet.  We can't wait for it to come in and tear up the orange monster currently living in the two room.  Oh hardwood, you had me at hello.