Tuesday, March 21, 2017

The Battle of the Three "R"s

We are just over a year into our 1954 Canned Ham Trailer remodel.  It's starting to feel like an episode of "Grand Designs".  (If you haven't checked it out, "Grand Designs" is a fabulous British TV show about self-builders. Season 1 is now on Netflix!)  In pretty much every episode, the naive homeowner has a unrealistically small budget and and even more ridiculous time frame.  Build a whole house in 9 months with 300 pounds? Sure! Why not!?!  2 years later and 600 pounds in the hole the home is done and the show is over.

Thankfully, our little "Grand Design" is on a much smaller scale money-wise but our original plan of having it done last Labor Day was hysterically unrealistic.  At this point, we are about $1000 in and have just finished getting the main shell of it back together.  Our main huddle to get to this point is just having enough of a full weekend to get work done.  This has not been a project that we can put in 1-2 hours and walk away then easily come back.  It's needed FULL days of undivided work which is pretty much impossible with 3 kids.
A year of work- walls and framing done
So, to get us back on track, we created a calendar that gets us finished in June.  We have already altered our calendar several times, trying to decided what order of operations most makes sense but we are getting there.  Our walls, floor and framing have all been replaced so we are now on to building the furniture.  So here, we get to the three "r"s.  Do we Renovate, Restore or Replicate?

My definitions of the three in the context of this project:

Renovate: Use the shell and restore, modernize, overhaul the rest. (Think of the bathroom we renovated in our Decorah house.  We tore it to the studs and built everything new on top of that, totally changing the layout, fixtures, etc)

Restore: Take what is already there and fix it up.  Return it to it's original condition.  (Take old carpeting up and restore the hardwood floors under back to their original- or close to condition).

Replicate: Make an exact copy. (Like when "This Old House" takes a piece of existing molding, creates a mold of it and makes a cast to then replace this missing portion).

When we set out on this adventure a year ago, we had every intention of replicating the original design where it was still present.  We carefully took measurements and drew outlines of old cabinets and shelves planning on making copies since the original wood was too moldy to use.  Fast forward a year later and we are a lot less interested in making exact replicas of the original trailer.  Vintage trailer enthusiasts are going to have our heads but at the end of the day it's our trailer and our project.

Many things contributed to this decision including time and money but a lot of it came down to supplies.  When you work on a project for such a long time, luan that once was $5 a sheet and at the local hardware store is now no where to be found, the closet match an hour away for $25 a sheet.  So unmatched luan which makes up the interior walls and ceiling of the entire trailer forced us to rework our original plan and make adjustments.  Such is life.
Right side wall out of original luan; ceiling curving to back wall in new, lighter luan
This mind flop from replication over to renovation then took us on our never-ending search for supplies and design ideas which took us to every home improvement, restore, and building supply store in the entire Portland area... much to our children's dissatisfaction.
 And husbands.
 On top of potty training the littlest one, I don't know how we've made it.
Make your own port-a-potty in the back of the car!
So, after several months of searching, looking at paint colors and debating bed layouts, I think we finally have settled on a design. Good thing because if we had made the kids look at flooring options anymore we would have had a mutiny on our hands- no matter how many donuts we bribed them with.

Here is our "final" design plan.

We reupholstered the front benches last winter so the fabric there was our jumping off point for everything else.  Next step was deciding what cabinet wood to paint and what to leave wood- after our luan debacle which caused us to decided to paint the side walls, we decided it would make sense to paint most of the wood so it blends in with the walls better.  We are restoring the old, original turquoise stove so we have picked a great, dark blue for the kitchen cabinetry, "Approaching Storm" by Glidden.

The side walls will be painted white which will showcase the beautiful luan that wraps over the ceiling.  Picking white might be the hardest thing around but after much contemplation, I settled on "Sleek White" by Behr which is nice and warm but doesn't show too yellow like others did.

Finally, the flooring decision.  We had originally settled on beetle kill blue pine.

We found this stuff at a local building supply resupply and fell in love.  Beetle kill pine is a result of a beetle epidemic in which the beetles bore through the trees, eventually killing them.  The trees have these beautiful blue streaks running through them, making them perfect for unique home projects.  Unfortunately, once we did the math on the wood plus other supplies for laying hardwood we were at $300.  A little pricy for our trailer project.

"Grand Designs" and "This Old House" to the rescue again.  As we were driving to yet another hardware store to look at linoleum yet again, when I remembered a technique where you paint on top of concrete then throw paint flakes over to give a polished concrete, kind of vintage linoleum effect.  This is usually used on basement or garage flooring but why not our little trailer?  Lightweight, fast application, easy clean and cheap?  Sounds perfect to me.  $50 later and we are in business.  We chose Behr's 1-Part Epoxy Concrete and Garage Floor Paint tinted in Pacific Fog with Valspar's Paint Flakes in Granite.
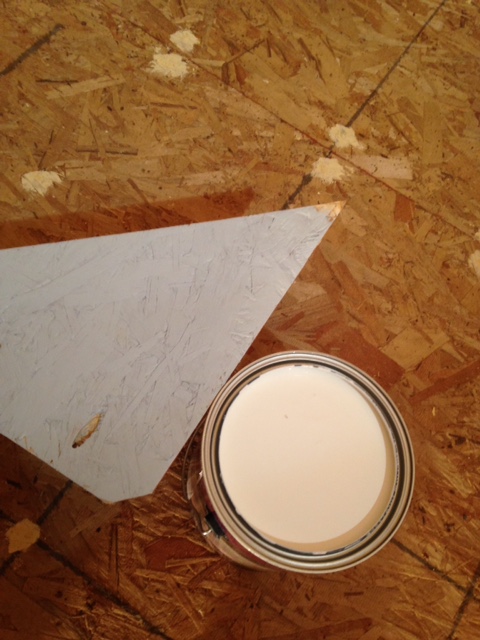
Sample of grey flooring before flakes are added with white wall color
Finally, design in place, we are now painting the walls and floor and then building cabinetry for the kitchen, back beds and front dining area.  Hopefully, we will starting making some more visible progress soon!
Side wall painted white
Flooring prepped for paint


Thursday, July 7, 2016

Meet My Pod-Husband

Hell has officially frozen over.  Start betting on the Cubs because they are definitely winning the World Series this year.  Pack up the kids and head to the country because the zombie apocalypse must be close.  Andy is REUSING old material.  He is using NAILS.  Seriously people.  The world is ending and this project has broken my husband.

Andy and I use holidays to jumpstart new projects or make leaps of progress in old ones.  (See the kid's bedroom remodel of Christmas break 2014).  Andy had 4 days off of work for the 4th of July so we decided to buckle down and work, work, work on our vintage canned ham trailer.
Our helpers ready to celebrate the 4th!

After finishing replacing the entire floor over Memorial Day weekend, we were ready to move on.  Cue in three weeks of discussions over what part to do next- walls or roof?  After much discussion, we decided it made most sense to tackle the walls next.  These old trailers are like jigsaw puzzles and I don't really think there is a "right" or "easy" way but depending on what you have to replace, you need to just make a decision and go with it.  Andy leaned toward replacing the roof first to help with the overall structure of the trailer but I convinced him the walls were the way to go so we wouldn't be nailing a new roof on top of the walls which would later be replaced.  After the weekend, we both agreed that we made the smart choice.

To replace the sides of the trailer, we first needed to add some interior support so the whole trailer wouldn't fall over when the side was removed.  Andy added 2 support beams to hold up the roof and several triangle wedges to hold up the other side of the exterior wall.

Next step was to remove the exterior skin which is made of thin aluminum held on with a variety of million-year-old, rusty screws and nails.  Like really mean, nasty nails that have a screw-like spiral shaft.  Whoever thought of those didn't consider or care about someone ever having to remove them.  Similarly to removing the metal on the front of the trailer, Andy and I used a catspaw, hammer, screwdriver and paint scrapper to remove most of the nails/screws. The catspaw is my new favorite tool, so much so that Andy had to run to the store to buy me one for myself.  Flowers and chocolate aren't the way to this girl's heart... just bring me a catspaw and I'll be yours forever.

Most of the screws/nails came out with a variety of these tools.  Each metal piece that came down was carefully labeled and set aside to later clean and put back on.  Extremely stubborn nails were cut with a sawzall then pounded down or pulled out.

It took us about half a day to remove all the metal and windows on one side of the trailer.  Once removed, Andy looked through the existing framing and declared he was just going to patch in the worst spots.  People.  This is pure insanity.  I mean, this man has never saved a piece of anything during a building project in his entire life.  "Patch it in"?!? It's seriously crazy talk.  I murmured a "sure, sounds good" as I stared at my new pod-person husband.  I mean, he looked ok.  Still blond, big nosed with a constant whiff of lumber smell around him but he was NOT my husband.  Heading inside to get my new pod-husband some sugar water, Andy spent the evening replacing a few boards of the frame, the worst of which was on the curved back bottom of the trailer.  To get wood to curve, Andy cut framing boards down with the table saw into thin, long pieces then used a chop box to cut slices along the area that would be curved.  This provides relief to the wood, allowing it to bend.  Pretty amazing stuff.


Heading to bed that night with my new husband, we were suddenly awoken by a large gust of wind followed by a metal on metal crunching sound.  Rushing to the window, Andy looks at our now bald trailer.  Metal roof totally gone.  Andy headed downstairs to survey the damage.  Waiting upstairs, all I heard was chuckling.  Cursing is one thing, but chuckling from Andy means things are really bad.  Somehow, the entire metal roof was swept off the trailer, made a summersault in the air and fell directly into the pile of metal pieces we had painstakingly taken off the entire day before.  Metal was strewn throughout the yard with several window frames crushed.

After spending months worked up about how we were going to get the roof off and how/where we would store it, a kamikaze gust of wind did it for us.


The next day, I was on metal-bending duty while Andy continued on the side of the trailer.  With a metal brush, I cleaned all the small metal parts and window frames.

To rebend the frames that the roof had cruelly bent to hell, I used a hand seamer then a mallet to bang the frames back into shape.

Andy's tool box was the perfect shape and size to use as a template

Worked like a charm!
Before

After


All the window frames then got 2 coats of silver spray paint.

That done, Andy and I took the interior paneling down, only one section at a time.  The paneling was removed carefully (see my now claw hand after 4 days of using that catspaw and hammer to remove millions of nails) so we could trace the old panel onto new luan.

Here's where stuff got real weird.  We started using a stapler attached to an air compressor to staple the luan into the framing.  The thin luan just wasn't attaching to the framing so next thing I know, Andy has a hammer and nails in his hand.  Perhaps to most, this isn't a sign that your husband is now a broken man but I'm tell you... Andy is now just a shell of his former stuff.  Andy's hatred of nails rivals my hatred of rubber bands (just work in an archives and you will come to hate the nasty, rubber things that look like dried up worms stuck to paper after a short year or so).  Any time I bring home a "new" piece of antique furniture, he grips for DAYS about the nails.  So to see him now using a bucket of nails and a hammer is pure insanity.

Who is this man?!?
Four day weekend complete, we have a finished wall and are now about half-way done. with all the exterior work.


And I have a new pod-husband.  Please help.


Monday, June 13, 2016

Gidget Gets a New Floor

After two full weekends of hard work and clear skies, Gidget has a new floor.  We will not pretend that any part of our work on our 1954 canned ham trailer will be a "restoration" project.  This is full on replication.  As we dig more and more into our little gem, we are shocked that it lasted as long as it did, held together mostly with spray foam and rusty, crooked nails.  By the end of all of this, we expect the only original pieces left will include the metal skin, windows and stove.

A few months ago, we spent a weekend doing some basic interior demo to prepare the trailer for it's eventual and inevitable exterior repair.  In the months of rain, we measured all the cabinetry that came out to replace later, took apart and cleaned up every component of the Martha Washington stove and replicated the two front benches that fold into a bed.
A sneak peak of the new bench fabric
Finally into gorgeous spring weather, we took advantage of a couple of free weekends with the promise of no rain and tackled the front wall.  The biggest oddity in the way these trailers were constructed is you have to take them apart from the outside in just to replace any of the interior paneling.  All of our interior paneling was rippled from decades of water and growing mold on top of mold so we knew going in that every wall would have to be replaced.

Manned with our favorite demo tools- a cat's paw, hammer, crowbar, drill and screwdriver- as well as the knowledge from many nights watching YouTube videos from the expert trailer guru at http://www.cannedhamtrailers.com we started in carefully removing the corner rails then metal exterior skin.  Each wall of the trailer is supported by the adjoining wall so to maintain the structure, we only remove one section at a time.
Andy not excited about all the flathead screws


Under the skin, 1950s insulation, framing and paneling was revealed.


Once we carefully removed the window (which we will reinstall), we were able to remove the framing and paneling, leaving a large section we could then use to measure when we replicated and replaced with new wood.

Removing the front panel revealed the floor which kind of led into a long rabbit hole of thinking we could just replace small sections but then realizing it was better to just go ahead and replace the entire flooring.  (We made this decision after I had already spent hours trying to peel crazy old linoleum off of plywood, grr).
Removing the linoleum with a Ridgid JobMax... this turned out unnecessary when we decided to replace the floor

This was a slow process- not difficult but just time consuming to remove things slowly to maintain the original structure.
Using a circular saw to cut flooring into smaller sections to remove
The floor has 5 layers:  starting at the under carriage with the metal trailer frame, followed by soundboard, then wood framing, insulation and finished with plywood.  All of this needs to be carefully measured, cut and tucked inside through the small front opening then fastened with carriage bolts.
Original flooring section- the original didn't have insulation but we decided to add it


Every carriage bot needs to be removed from underneath- many needed to be cut off

New soundboard and framing

New insulation
We only replaced the front half of the floor on the first weekend because we were afraid that if we took all the flooring out the structure would be too flimsy.  Once the front floor was replaced, we replicated the front paneling using 1/8" thick luan and 2x2 framing cut down into 1 1/4" to match the original framing.  All this was screwed back into the side walls... that will eventually need to be unscrewed when we replace the rotted sidewalls.  Super annoying but we don't know another way around it since you definitely can't take all the walls off at once as you would loose all the structure.  As it was, to get the front panel screwed in, we had to push on one side while screwing the the other just to get it all straightened out again.

The next clear weekend, we did the exact same thing to the back half of the trailer first removing the exterior metal, framing and paneling then replacing the flooring.  The back section was especially disgusting with sections of moss growing in the flooring as well as a new birds nest in the floorboards.
Terrifying hole in floor covered with random pieces of plywood


The back bar of the metal frame was so bent out of shape that after some waffling, we decided to replace it.


Old bar on left; new on right
Really, Andy doesn't need much of an incentive to whip out his welding mask and at $12 for the metal was a cheap fix.


New bar welded on, the rest of the floor was replaced.
Back half ready for insulation and plywood
Gidget is happily sitting in our driveway now with a new floor.  After 7 months of renting, we are all happy to have the cheerful hum of saws running again.  We aren't getting too much into specifics here with these updates so please check out our favorite resource: http://www.cannedhamtrailers.com if you are tacking a similar project.  Thankfully, we have our super helpers on the job with all our projects.